You had a fun event with a photo booth and got lots of photos, and now you’re wondering what to do with them. Here are some easy ideas.

Put the Photos in Photo Album
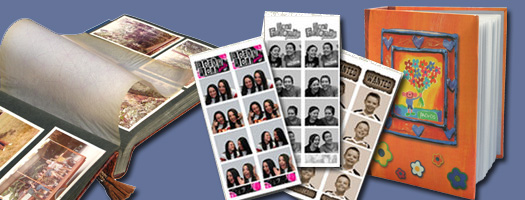
The easiest thing to do with photos from a photo booth is probably just put the photos in a photo album. You can keep the photos as strips or cut them apart with scissors or an X-Acto knife. Label the page in the photo album or the back of the photos to help you remember who is in the photo and where and when it was taken. To help preserve the photo, you can also use an acid free photo label on the back of the pictures.

Frame the Photos
Frames are available just about everywhere. Look at frame stores, craft stores and even the dollar store. You can frame the whole strip, cut out the photos to fit the frame or mount or matte the photos to fit a larger frame.
Make a Scrapbook
Photo booth pictures are great for scrapbooking. If you are not someone who normally makes scrapbooks, you can find books and magazines at craft stores full of instruction and ideas, take a class or workshop, or look online for ideas. Scrapbooks are a great way for creative individuals to express themselves. You can start with a blank book and decorate it or start with paper, cardboard and other supplies to make your own book from scratch. Include pretty papers from the store, scraps and recycled items, cloth, wrapping paper, stickers, invitations, and other items to make each page as unique as you are. Top the pages off with your unique photo booth pictures.
Make Magnets
Here is an easy project. You can purchase magnet blanks at craft stores or office supply stores. Simply peal off the backing on the magnet and attach to the photo. Trim the magnet or photo as needed. To preserve the photo, laminate it. You can pick up laminating sheets at the same stores with no machine necessary- just peel and stick like the magnet. Stick your photo on your own fridge or magnets make great gifts!
Make Cards
With a little rubber cement or the right glue, you can attach photos to just about anything. To make fun greeting cards, pick up some pretty colored card stock and envelopes at the craft or paper store. Cut and fold the paper to fit the envelope. Glue the photo on the front and decorate the card however you like. Draw pictures, write on it, glue on ribbon or colored paper… It’s your card, so you are limited only by your imagination.
Photo Cubes
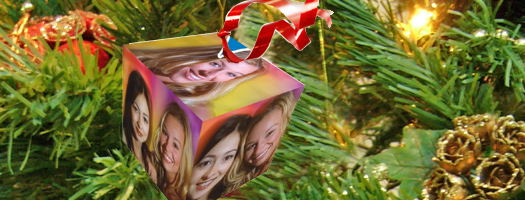
Photo cubes present a unique challenge to work with because of their 3-D assembles shape. You can always cut the photos apart and use them just like any other photo in any of the ways listed previously in the article or you can assemble the cube and put it on display. In order to better preserve the photos, consider laminating them. You may find it necessary to score the laminate at the folds using X-Acto knife in order to get them to crease properly.

Make Ornaments with Photo Cubes
Photo cubes make great Christmas ornaments. Simply poke a couple holes in the top and string a ribbon through the holes to hang the cube with. Decorate the cube with glitter and glue to make it twinkle. Assemble the cube and hang it on the tree or give it as a gift. If you want to make a sturdier ornament, you can laminate the cube. You can also spray a clear glossy finish over the photos to help preserve them.
What have you done with your photo booth photos?
Have a great craft idea for photo booth photos or have you done something wonderful with your own photos? Share your idea and/or your masterpiece by emailing us at submissions@gophotoevents.com.